Local networks eSIM
City eSIM
Regional eSIM
Steps to take:
There are 02 ways of installing an eSIM on iPhone: Installation with QR code and Manual Installation. See each one step-by-step below:
Need to know before carrying out eSIM installation and activation on iPhone:

Open your email and find the email we sent you with the QR code. If you have not received your code, contact us.
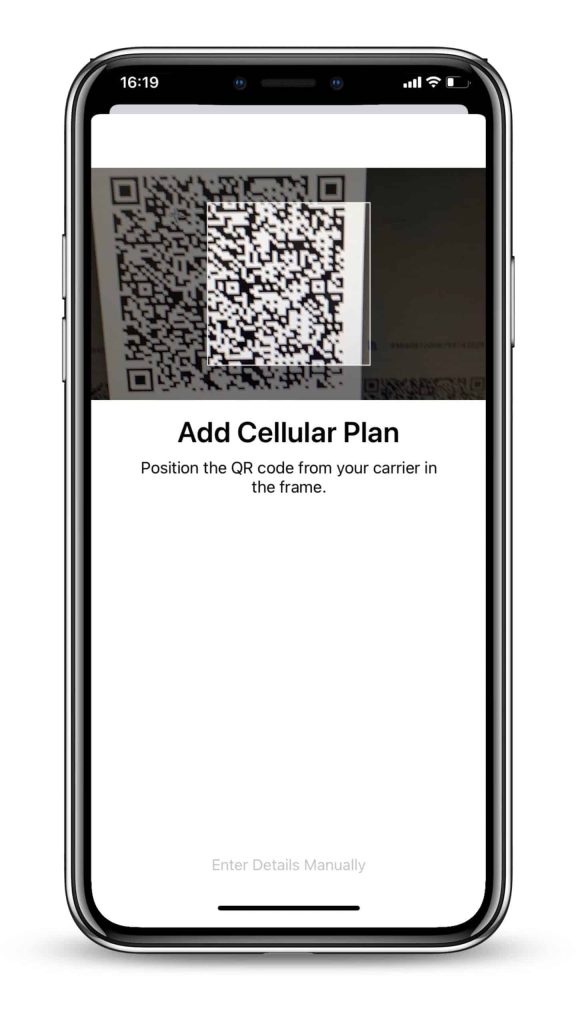
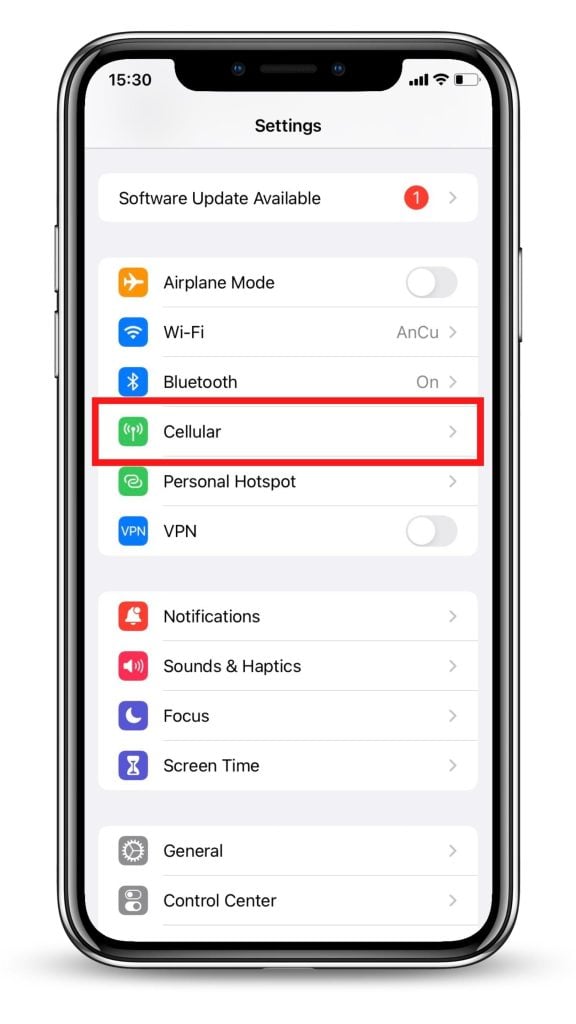
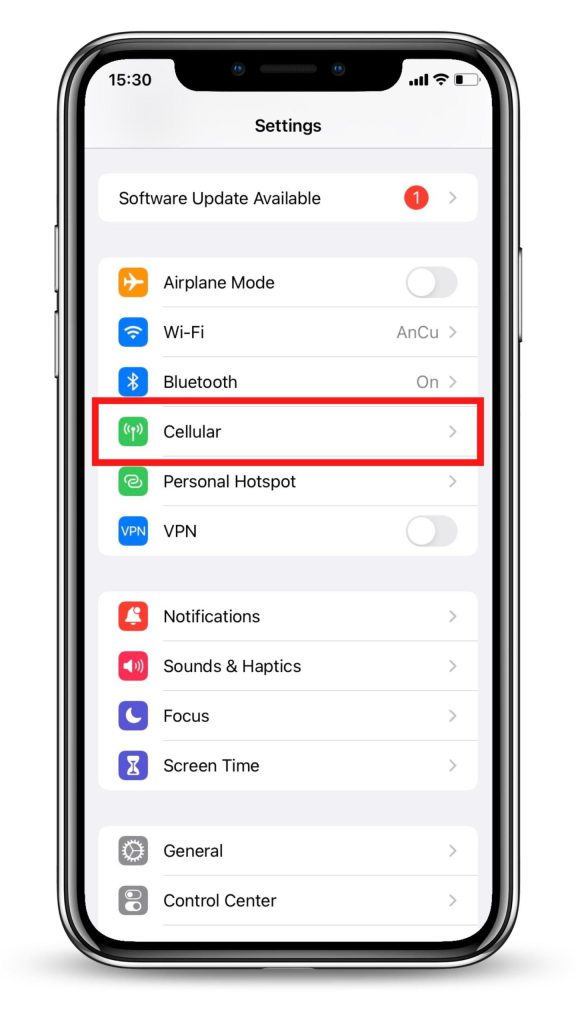
You can either open your camera and scan the code, or navigate to “Settings”, select “Mobile Data”, and choose “Add Data Plan” to scan the code from there.
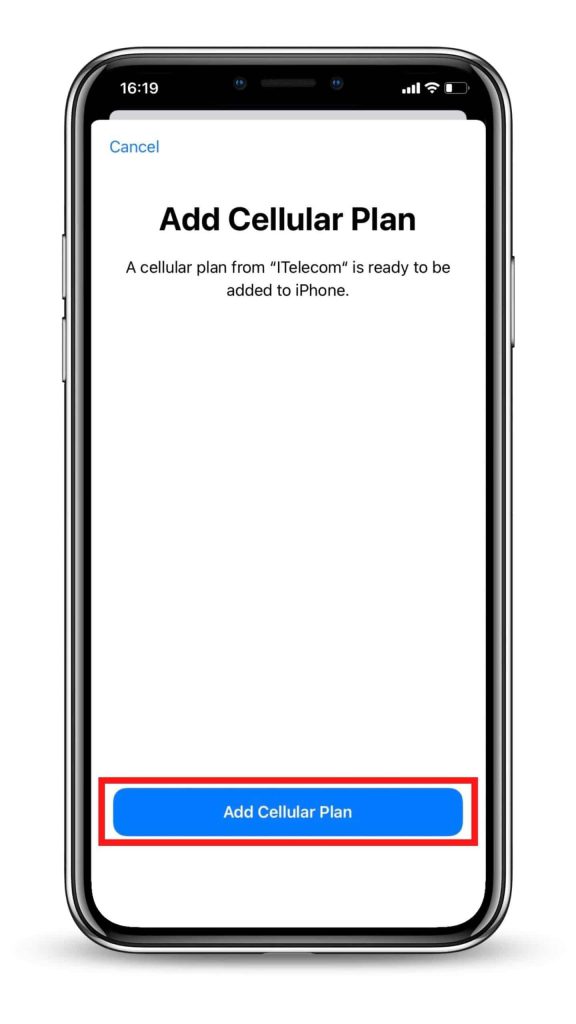
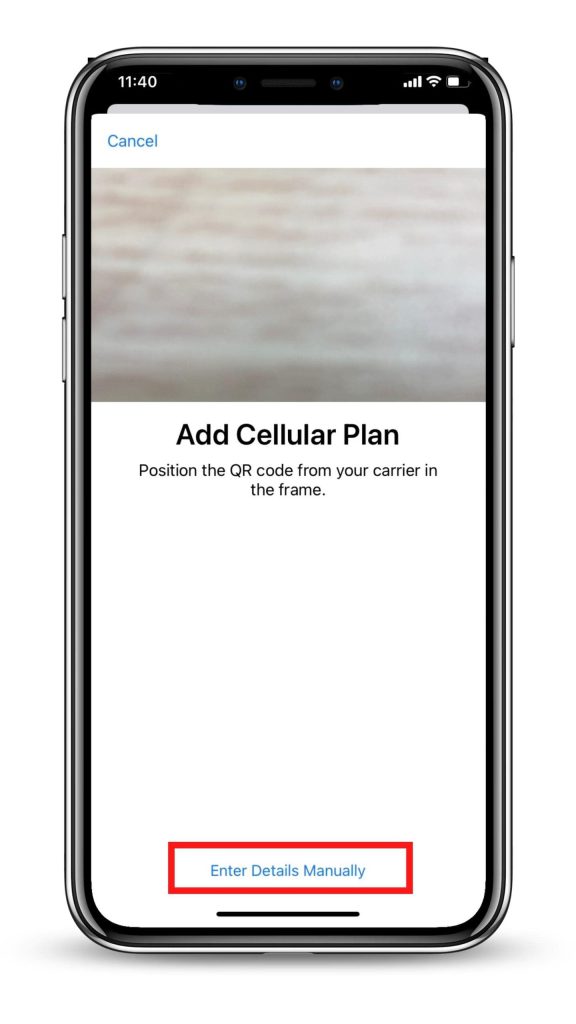
Scan the QR code to start the installation process. Use our guide below for step-by-step configuration.


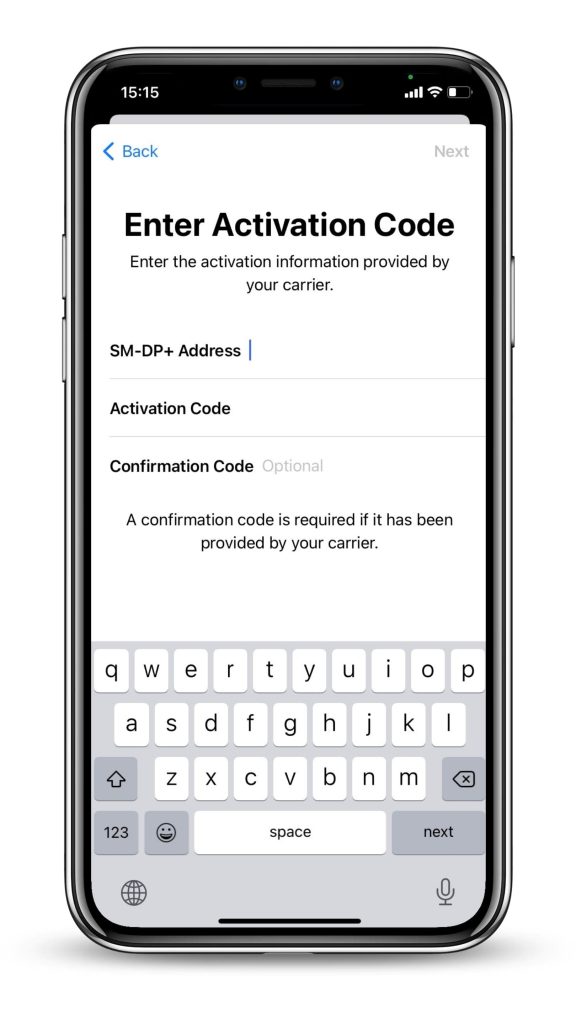
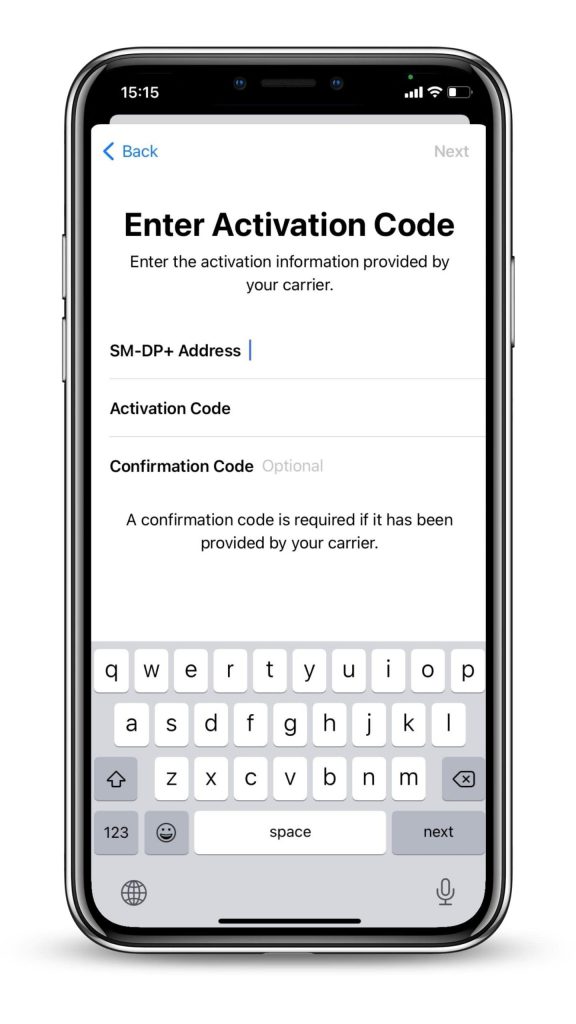
Check the email we sent you with both the “SM-DP + address” code and the “Activation Code”. If you have not received your code, contact us.
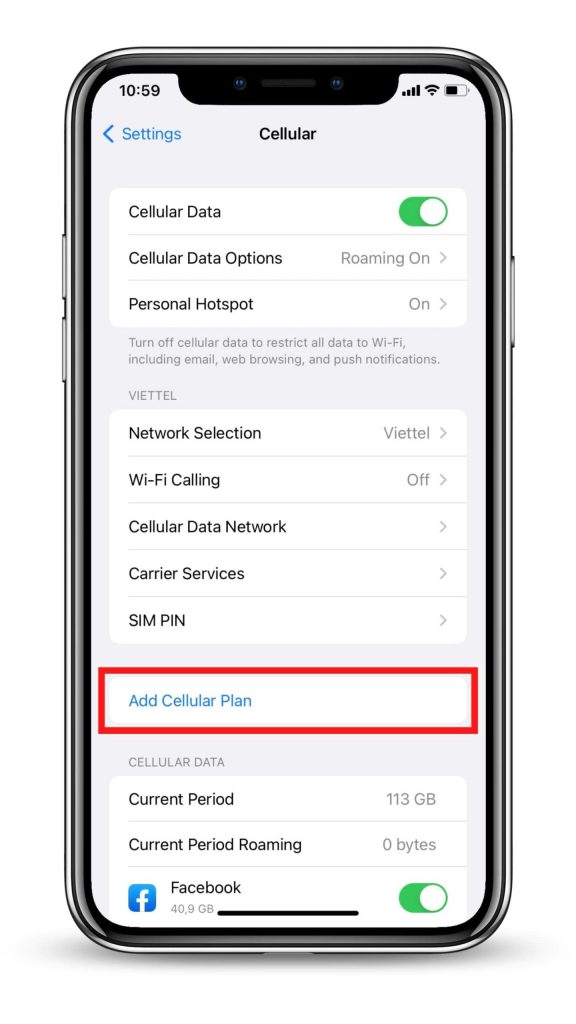
Next, go to “Mobile Data ”, click on “Add eSIM” or “Add Data Plan” and select “Use QR Code”.
Scan the QR code to start the installation process. Use our guide below for step-by-step configuration.
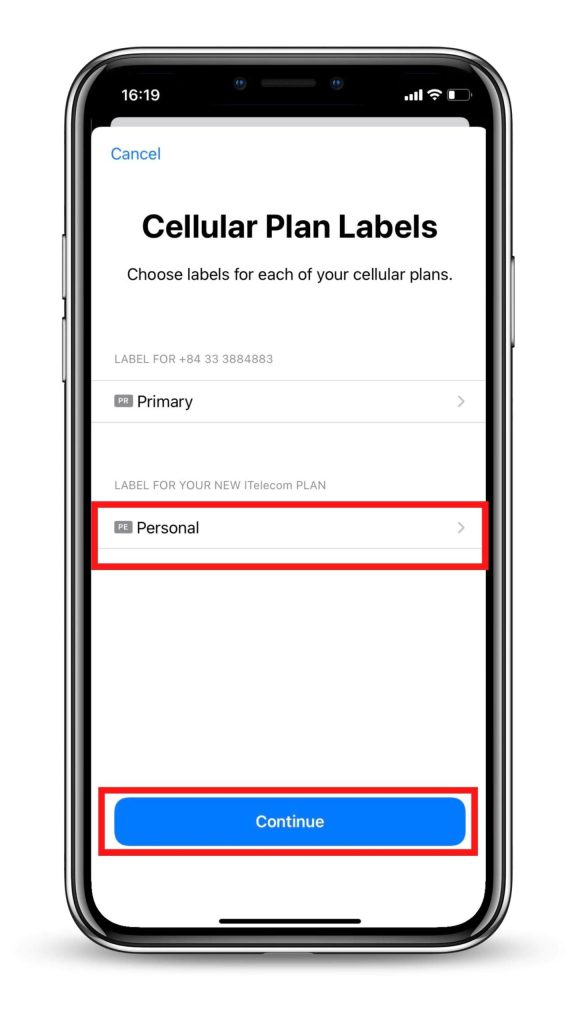
 Cellular” width=”576″ height=”1024″>

After installation, to turn on eSIM on iPhone when landing in Thailand, you need:
You can use 2 following ways to check:
1. Make sure that there is at least one bar in the signal icon on your iPhone.
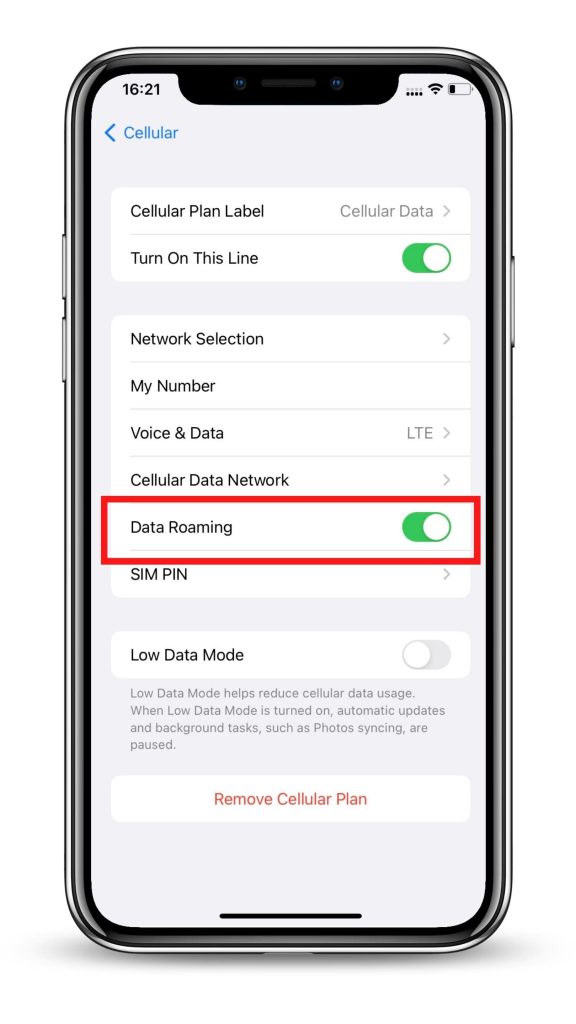
2. Go to “Settings” on your iPhone, select “Mobile Data”, click on the option that you have labelled before and check that “Data Roaming” is turned on.
You might need to erase your eSIM if:
Don’t erase your eSIM as a troubleshooting step, contact eSIMThailand if you need support when having problems with your eSIM.
If you erase your eSIM, you’ll need a new one. Then set up your new eSIM.
Now let’s check out how to remove an eSIM from your device:
In case you cannot connect to the internet, please adjust your phone APN (access point name) by:
You can store multiple eSIMs on your iPhone, but only one can be activated simultaneously.
If you want to change the eSIM, follow these steps:
You might need to erase your eSIM if:
Don’t erase your eSIM as a troubleshooting step, contact eSIMThailand if you need support when having problems with your eSIM.
If you erase your eSIM, you’ll need a new one. Then set up your new eSIM.
Now let’s check out how to remove an eSIM from your device:
Although you can have multiple eSIM profiles on one iPhone (upto 20), it is recommended that you should install 3-4 eSIM on each device. There will only ever be 1 active eSIM profile, though.
iPhone from XS models and newer models have dual SIM features with an eSIM and a physical SIM card.